Pages

Showing posts with label make monday. Show all posts

Wednesday, March 27, 2013

Make Monday: Crayon Eggs!


If you have a lot of broken crayons lying around, keep the pieces for melting into crayon shapes. Introduced to us by a friend as their annual Valentine's, Judah and I expanded the idea and used our broken crayons to make Easter eggs for a fun and easy Easter activity.

1. Sort and separate all your broken crayons. Remove any remaining paper from crayons.

2. Place broken crayon pieces into the baking silicone rubber pan of your choice. Choose colors based on designs for a fun melting experience.

3. Bake at 400 degrees for approximately 20 minutes or so. Ovens, pans, and crayons may vary your oven temperature and baking time.

4. Allow crayons to fully melt. Once the crayon has melted, take out of oven, and let it sit to cool.

5. After the crayon becomes cool and solid, remove from pan.

6. Use for decorations, fun gifts, or to simply color. Have lots of fun.


Tuesday, October 16, 2012

Make Monday: Pumpkins


Orange everywhere! Our wall is covered with pumpkins to celebrate the Fall season. And making these pumpkins made for a good Fall activity on a cold, rainy day.

My neighbor expanded on our coffee filter flowers. Her son wanted to do a craft with eye droppers. So instead of using washable markers for color, they came up with the idea of using droppers with colored water.

To get started, recycle and save your infant medicine droppers. Add food coloring to various cups of water to get desired colors. Squeeze droplets onto the coffee filters watching the color diffuse together. Dry between paper towels or on paper bags. Once dry, add black construction paper faces or connect pumpkins with green vines and leaves for your own personal pumpkin patch.

Decorate your own house with pumpkins.


Tuesday, September 25, 2012

Make Monday: Celebrate Harvest with Corn.


We have already been to the farm this harvest season for a combine ride. The kids have a blast seeing the combine suck up those golden corn stocks through the field. Then a sight to see is to watch the kernels being transferred over to into the wagon before it makes its way to the elevator.

To celebrate harvest season, we decided to make some corn stalks all our very own. Then we shucked some of our own ears to see the yellow dried kernels inside.

Supplies

Bubble Wrap
Yellow Washable Finger Paint
Green Construction Paper or Tissue Paper
Paper Towel Roll
Glue

Instructions

To make corn stalks, brush washable yellow paint over the paper towel roll. Let dry and then glue green leaves to the sides of the roll. To make corn on the cob squirt yellow washable finger paint on top of the bubble wrap (bubbles facing up). Roll the paper towel roll around for 3-D kernel effect. Let dry and then glue green leaves at the base of the corn.

Decorate your own house with corn stalks hanging on the walls and cobs of corn in a basket for a table center piece.


Monday, August 6, 2012

Make Monday: Olympian Medals

Do not forget all those medals you need for your little Olympian as they participate in their own Olympic events. Here is a way to make your own medals.

Supplies

String
Metal Tin Can Lid
Nail
Hammer

Instructions

Use a lid from a can of food as your base. Different cans appear gold or silver in color. Make sure it is clean without rust. When opening the can, use a can opener that will not make dangerous sharp edges (Pampered Chef has one). Take the nail, making it upright, and pound a hole with in the top of the lid from which to hang the string. Punch more holes with the hammer to make a design such as USA. Decorate the lid as otherwise desired. Sport your medal after finished events.

Note: This project works well with older kids. Please supervise the kids using hammers and nails. Do this project on a surface used for hammering.

Monday, July 30, 2012

Make Monday: The Sun is Shining!

With all this heat comes lots and lots of sunshine! Unfortunately, if you live in the Midwest like us, going outside to enjoy this sunshine is out of the question in these hot temperatures. So we took sunshine indoors by making sunshine to go with our flowers.


Supplies

Random Pasta noodles, different shapes
Paper plates
Yellow colors or paints
Elmer's glue

Instructions

Dig out your macaroni and penne pasta for crafting. Meanwhile, color or paint your paper plate yellow, the color of the sun. Glue on your pasta on as desired. Let paint and glue dry. Then hang up your sunshine with your flowers. 


Monday, July 2, 2012

Make Monday: Bandanas for the 4th!

The heat is bad here in Iowa. And it is supposed to be bad over the 4th of July festivities. If you are looking for a creative way for your kids to beat the heat indoors and then again for for the parades, then make some patriotic bandanas.

Your kids will love participating in this project as well as wearing them for all your activities this week. And on the side you keep their head protected from the hot sunshine. As a plus, all the grandparents will think they are so cute sporting their creations with their star sunglasses, parade beads, and Popsicle mustaches.

To get started, purchase a fabric square of washable white cotton from a hobby or fabric store. We actually found ours from Oriental Trading Company that had "USA" designs a while back. Find some Elmers washable glitter paint pens or washable fabric paint pens.

Find a location safe to paint and paint the cloth with the glitter paint pens. Lay flat to dry. Flip over and do the other side if desired. Once dry, wear to the 4th of July parade to block the sun.

We learned a few things The paints do leak through until they dry. Also, Q-tips work well to spread out globs of paint onto other portions of the design. Small dots work the best.

Happy Independence Day! Have fun letting your child shine their independence through their bandana creations.

Monday, February 13, 2012

Make Monday: Learning our Shapes


Judah is obsessed with those colorful, little craft pom poms. Anytime he sees them we have to get them out to play. So that is when I decided to turn it into a learning opportunity to practice gluing and learning about shapes.

We drew shapes onto white card stock; I let him pick the shapes as he named them. Then we put some Elmer's glue onto a paper plate so that he could dip the poms poms into the glue. We glued the pom poms onto the lines on the paper, making our shapes.

He had so much fun using the pom poms even if it was used to learn shapes. I let him pick out the colors. Judah still likes to show the shapes off to people, especially the letter "J" we made for his name. And now he refers to them when trying to draw his own shape designs as he attempted to do so the other day.

Think outside the box when it comes to learning. Take cues the kids may have and use them as basic educational means; I never would have thought of this idea until Judah wanted to play with the pom poms and make shapes. Learning can and should be fun.

And expand on your ideas. For example you could turn this project into a math lesson on patterns as well for older kids. Start a color pattern and have the child finish it with the correct color of pom poms. Or try some harder geometric shapes designs.

Monday, January 30, 2012

Make Monday: The Martha Stewart Mirage

I'm a work at home mom. I write political articles and take care of my kids. I'm lucky that when I need complete concentration, I can take my boys to Grandma's house (which I do almost daily). But I got to thinking, if I'm working from home, I can be like Martha, right?

Ha. First of all, through my facebook couponing group I was able to get a free subscription to 
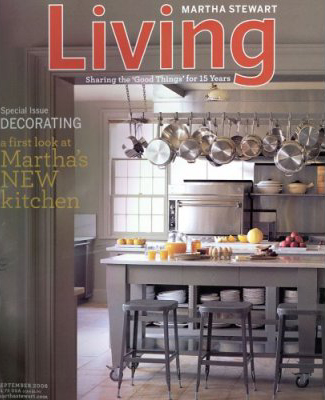
Martha Stewart Living magazine. Step one of becoming Martha, done.

And then after getting all of the laundry folded at 10 PM on Sunday night (it's a glamorous life, I know) I crawled into bed and paged through the magazine.

Oh. My. BORING. I'm so glad it was free. And I still think I paid too much. "Apple and raisin blonde scones". Really, Martha? For when. Cause I don't know of anyone who has friends over for tea. I found the "make your own pop up Valentine's day cards" highly amusing. I can hardly get the kids to write out their pre-printed dollar store Toy Story cards without someone spilling, ripping or sneezing on them. Fancy cut out pop up cards? You've GOT to be kidding me.

What really cracked me up is the $800 upholstered chair for your bedroom. Not for sitting, just for decoration. First of all, Martha, at the end of the day, I'm exhausted. If there's a place to land, I'm landing on it. Whether it's intent is for my butt or not. And what's the point of having a chair you CAN'T sit in? Isn't that what chairs are for? I can imagine my mom going cross eyed if I had glasses sitting out on the table and said, "Oh no, mom. Those aren't for drinking out of, they're just nice to look at."

Maybe I'm a little more realistic than Martha. Maybe I'm busier. I just don't have time to "grind a cinnamon stick in the morning to add to my coffee". Whatever comes out of the Dunkin Donuts bag is fine for me. Usually I don't get to drink it while it's hot anyway.


So yes, if you visit my home you'll see a Martha Stewart Living magazine on my nightstand. Just don't assume I have a fresh sprig of eucalyptus in the tank of my toilet to make the water smell good. (I may have made that last one up.)

I'm a realistic mom. I don't have time for the artsy fartsy stuff. And you know what? "It's a good thing."

Monday, January 23, 2012

Make Monday: Sheep Mask


For Judah's first birthday, we did a barnyard theme complete with masks. Will he found the leftover duck, the horse, the cow, and the pig masks the other day in the cupboard and has been playing with them ever since.

After looking at the craft book last night he decided he wanted to make a sheep. And that is when I came up with the idea of doing a sheep mask for his collection. We had fun doing just that this morning. And Judah even practiced his gluing objects.

Supplies
Small cotton balls
Black felt
Black pom pom
White paper plate
Scissors
Elmer's glue
Elastic string or a jumbo Popsicle stick
Pen
Hole punch

Instructions
First I took a small medicine bottle in the shape of a circle to trace for eyes. I cut these holes out. Next, Judah started dipping the white cotton balls into glue and sticking them onto the paper. I glued on a black pom pom for the nose and black felt triangles for the ears. Judah found the little colored pom poms to glue and we decided our sheep would have colored spots. Finally I took a hole punch and cut out holes tying the elastic string to the size of his head. However, a large Popsicle stick at the bottom would also allow a child to hold up the mask.

Monday, January 16, 2012

Make Monday: Ribbon Banners to Wave to Music


I remember playing fitness girl when I was a little. I had this pink workout set that included a long, pink banner that you perform tricks turning it, swaying it, and swinging it with your arms. Apparently the effort was supposed to produce quite a workout in your upper body. I believe the set was called Get In Shape Girls. It was popular and I loved it!

I think of those memories every time Judah and I go to music class and move scarves or ribbons to rhythmic beat. We toss them high and low, play peek-a-boo, sway back and forth, make large circles, and swing them into figure eights. I must admit it is a fun activity even for me as an adult.

So we decided to make our own homemade ribbon banners to swing at home to our favorite musical beats.

Supplies
Jumbo Popsicle sticks or wooden paint sticks or wire
Tape
Different colors, shapes, and sizes of cloth ribbon or wrapping ribbon
Scissors

Instructions
Really this craft is quite simple. Cut various colors of ribbons different sizes and tape them to one end of the stick. Then play your music and twirl your way around the room with your ribbon banner. Be sure to mimic the beat and the pitch of the music going high and low, side to side, and moving to different shape designs.

Monday, January 2, 2012

Make Monday: A Solution for Wrapping Paper!


I hate buying too much wrapping paper for Christmas. If you buy too much, you have reels of paper leftover to store for an entire year. If you buy too little, you do not have enough to get you through the Christmas wrapping season. Then you still end up buying too much paper and end up storing it for next year. Thus you have the cycle of wrapping paper.

And I hate wrapping paper rolls because they are so hard to store and keep nice. Down on the floor the paper gets crinkled being bumped around. Plus you run the risk of the kids unrolling the paper, chewing on the roll, or even blowing into the roll. Against the wall, paper rolls constantly fall down succumbing to a similar demise. Finally, putting the rolls into a plastic storage container means you have one more large plastic bucket to store and find room for an entire year all for a few rolls of wrapping paper.

Currently I keep my wrapping paper, tissue paper, and bows in a hang up plastic device (on a hanger) in the closet. This keeps things accessible for year round birthdays and celebrations that require one present to be wrapped at the last minute. The plastic container hangs next to my craft table complete with scissors, tape, and ribbon for additional easy wrapping.

This year....I bought too much Christmas wrapping paper and now I am not sure where to store it. This picture came across in my email from a friend. And it looks like it would work without taking up wasted space on the shelf or floor of the closet.

Making this simple solution of stringing some wire across the ceiling of the closet could solve my problems. I thought it seemed like a good enough idea that I think I will pass it on for today's Make Monday project. A Make Monday project to help you solve a common problem around the house.


Related Posts Plugin for WordPress, Blogger...